Standard air purifiers do a good job of handling dust, pet dander, and other everyday particles. But sometimes, the results do not quite meet your expectations or address specific issues like strong odors or sensitive allergies. That is where a few simple DIY upgrades come into play. Here, I am sharing practical and budget-friendly ways to make your average air purifier work a little harder without risking the original warranty or your safety.
Why Upgrade a Standard Air Purifier?
Commercial air purifiers usually come ready to tackle everyday household pollutants, but I have noticed they sometimes need a tweak to be especially effective in spaces prone to smoke, odors, or pollen. Upgrading is not about reinventing your device. It is about finding little tweaks that give it a real boost.
Making small changes can help target those lingering pet smells or boost the way your device handles wildfire smoke. Many of the tweaks I cover here will cost less than buying a brand new filter pack, and they will make a noticeable difference. If you own an entry-level or midrange purifier, these upgrades are pretty handy for taking things to the next level.
For example, air purifiers with basic filters may not catch finer allergens or certain gases. By upgrading, you are choosing a proactive approach to keep the air in your living space feeling comfortable and smelling better. Over time, these small improvements provide cost savings and step up your home’s air quality in ways that store-bought upgrades alone might not achieve.
Popular DIY Upgrades Worth Considering
After trying a range of adjustments on different purifiers and reading up on user hacks from trusted forums like Reddit’s r/AirPurifiers, I found some smart options that do not require advanced technical skills. I am focusing on things you can do with basic tools and supplies from most hardware or home improvement stores.
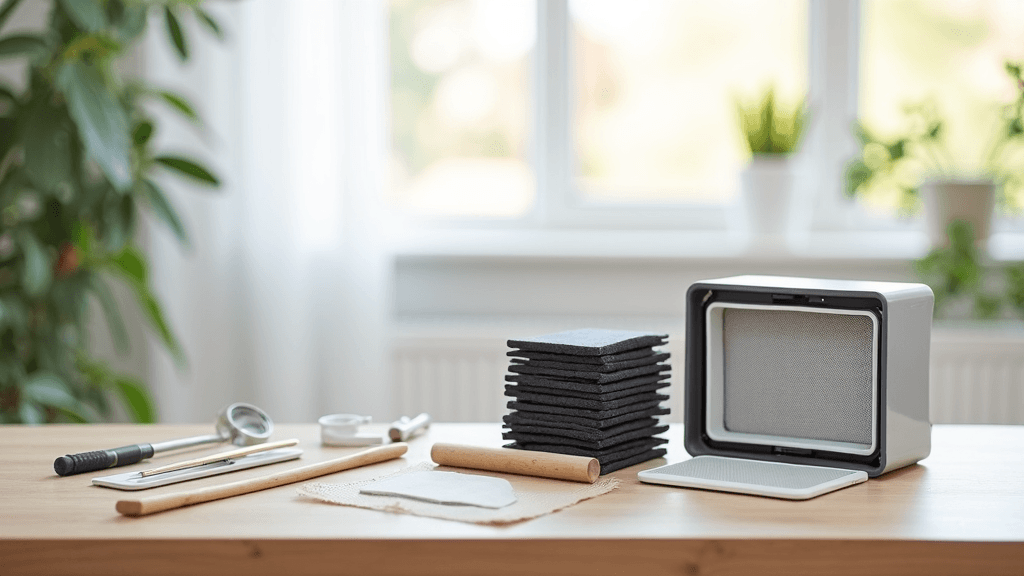
- Layered Filter Addons: Stacking new material (like carbon prefilter sheets) can target specific contaminants, especially odors or chemicals.
- Activated Carbon Pads: Adding extra activated carbon boosts gas and odor capture, which is a real benefit if you are battling smoke, kitchen smells, or VOCs.
- UVC LED Sticks: Compact ultraviolet sterilizers can be added to some models to help inactivate germs. Placement and safety matter with these additions.
- Prefilter Mesh Upgrades: Swapping out or reinforcing existing prefilters with finer mesh helps catch more hair and dust before it clogs your HEPA filter.
- DIY Filter Replacement: Using bulk HEPA sheets or cutting generic filter pads to size can save money and extend the device’s life if exact replacements are unavailable.
Steps to Upgrade: What You Will Need
It does not take a lot to upgrade your purifier, but you want to avoid causing air leaks or blocking airflow. I always use gentle tape, flexible scissors, and a clean work area. If you are going with carbon sheets or replacement pads, just make sure your device specs can handle a slightly thicker stack of filters. Some cheaper models have pretty weak fans, so a tight fit can reduce efficiency instead of helping it.
- Turn Off and Unplug Your Device: Before opening anything, unplug the purifier for safety.
- Measure the Filter Compartment: Accuracy is everything. Take extra measurements to make sure any additions fit snugly.
- Cut and Attach New Material: Cut activated carbon pads or mesh sheets to match the old filter shape. Attach them with soft, nontoxic tape along the edges to keep air moving through all layers.
- Check for Airflow Blockage: Run the purifier briefly to make sure the fan strength has not dropped dramatically. If you feel strong airflow at the outlet, you are good to go.
If you are adding UVC, always follow the product’s directions for placement and never let the light shine outside the device. UV upgrades should be the last option, especially for allergy control, since the benefits mainly support germ inactivation and do not address all particle types. It is important to understand which upgrades address the problems you want to tackle before getting started.
What Each Upgrade Does (and Who Benefits Most)
Not every upgrade suits every user or every room. Here is how I think about the best matches for upgrades:
- Activated Carbon for Smoky or Odorous Spaces: If you cook a lot, have indoor smokers, or just brought home a flea market couch, extra carbon pads will tackle those stubborn smells.
- Mesh Prefilters for Pet Owners: Fine mesh prefilters are a win for homes with lots of shedding pets or general dust. Less hair and fluff reach the delicate HEPA layer, so you do not need to change filters as often.
- DIY HEPA Sheets for Budget or Rural Users: If you struggle to find replacement filters for older purifiers, rolling your own with medical-grade HEPA fabric and a sharp set of scissors is a thrifty fix. Just check for a snug fit so air does not leak around the sides.
- UVC for Shared Bedrooms: Extra UVC LEDs can help families worried about cold and flu season, though they are not a full replacement for real HEPA filtration or surface cleaning.
Other upgrades, like more frequent cleaning of intake vents or using slightly thicker carbon pads, can help those living near roads or construction zones where outside air brings in additional irritants. If you frequently host guests or share your space with others who are sensitive to pollen, try adding an extra filter layer during peak allergy seasons and removing it later. Tailor each tweak to your specific household challenges.
Possible Drawbacks and How to Avoid Trouble
DIY upgrades work best when you know your purifier’s airflow strength and do not try to force in too much at once. Adding several thick pads can put an extra load on the fan. I always listen for motor strain or a change in airflow noise after making upgrades. If the machine suddenly sounds labored, it is smart to pull out extra layers and keep things simple.
- Check Fan Load: Too many filter layers create resistance, slowing fan speed and lowering cleaning power. Stick to one well-cut addition at a time.
- Mind the Warranty: Most air purifiers have warranties that do not cover DIY changes. If your device is still covered, try upgrades that do not require you to break any seals or use permanent adhesives.
- Keep Filters Dry: Activated carbon and HEPA work best when dry; never use damp pads or modified sheets.
- Avoid Unbranded UV: Safety matters with UVC light. Only use reputable brands and make sure the light never shines outside the unit. Never attempt UV upgrades on models not designed for them.
When in doubt, start with the easiest upgrade first and test for a week. That way, you make sure the change works for you before adding more layers or moving to a more advanced tweak.
RealWorld Scenarios and Results
I tried out a few of these tweaks at home and for friends with different air quality needs. An easy win was using generic carbon prefilter rolls to upgrade a purifier in a small kitchen. Within a few hours, strong turmeric and onion smells dropped noticeably. At a friend’s place with two cats, boosting the mesh prefilter helped reduce pet dander and hair clogging, so the main HEPA lasted a few extra months.
Reddit and YouTube are full of similar hacks. One user stacked two carbon layers to tackle wildfire smoke drift, reporting cleaner air odor and fewer allergy flare-ups during peak season. This matches my personal experience with adding activated carbon for quick odor control. People with allergies or chemical sensitivities especially notice a difference after even a minor upgrade, which shows how targeted tweaks can address specific air problems quickly.
Upgrades can also make a difference in changing weather conditions or during renovation projects. Extra filter layers reduce dust entering your living space if construction is going on nearby, for example, or keep paint fumes in check if you are painting indoors. Try a simple solution before investing in a bigger device or an expensive brand add filter.
Before You Start: Practical Things to Keep in Mind
Upgrading an air purifier is a smart way to extend its life and improve its abilities, but a little planning goes a long way.
- Choose Safe Materials: Only use filter materials marked as HEPA, activated carbon, or compatible with air purifiers. Steer clear of anything with strong chemical smells or nonporous barriers.
- Research Your Model First: Look up disassembly guides, user threads, or manufacturer details to know how your device is put together. This helps you avoid damage or voiding coverage.
- Prep and Test Carefully: After any upgrade, keep an eye on your unit for the first day or two. Check for overheating, odd smells, or reduced output and adjust as needed.
- Do Not Mix Too Many Features: Sometimes, less is more. Stacking too many layers just slows the fan. Focus on matching a single upgrade to your home’s main concern.
Common Pitfalls When Upgrading Air Purifiers
It’s easy to get excited about upgrades, but I have learned a few things to watch for. Overcrowding the filter compartment is a common slipup; it restricts air circulation and means the purifier is not moving as much air overall. It is also important to avoid any filter material that is not labeled for air quality use, like fiberglass insulation or oven filter pads, which can break down and send unwanted particles back into the room.
Using non-air quality materials might save money in the short term, but you risk clogging the unit or causing more harm than good. Be wary of shortcuts that skimp on safety testing or ignore manufacturer recommendations, and always double-check for fit, cleanliness, and the absence of any chemical odors after an upgrade. If something seems off, remove the new material and switch to a safer option.
Maintenance After DIY Upgrades
Once your upgraded purifier is running, double-check and clean it regularly. Homemade prefilters and added mesh catch a lot more dust, so give those layers a good shake or swap every two weeks or so, especially during allergy or wildfire seasons. If airflow drops off or you notice odd noises, check for blockages and recut materials to keep the fit loose and clean. Keep in mind, regular maintenance will get you the most benefit from your upgrades.
Staying on top of cleaning ensures that your efforts to step up air quality are not undone by neglected filters or clogged mesh. Set a reminder to check your upgrades as part of your normal cleaning routine, and you will get the best performance all year long.

Frequently Asked Questions
Here are some useful answers for anyone thinking about tweaking their air purifier for better performance:
Question: Does adding extra layers always improve filtration?
Answer: Not always. Adding too many layers can restrict airflow, which reduces the purifier’s effectiveness. Stick to one or two well-matched upgrades for the best results.
Question: Can I use any carbon pad for air purifiers?
Answer: Use only pads marketed for air purifier or HVAC use. These are treated and safe for continued airflow and do not shed loose dust or chemicals.
Question: Will DIY upgrades void my purifier’s warranty?
Answer: Any change that involves opening sealed parts or rewiring can impact a warranty. Check your device’s terms and use only reversible upgrades if you still have warranty coverage.
Question: Are UVC upgrades actually useful?
Answer: UVC light can help with germs, but it is less useful for dust or odors. Safety and correct installation are really important; never install extra UV in a device not designed for it.
Wrapping Up: Final Thoughts on Upgrading Air Purifiers
Smart upgrades let your standard air purifier work more efficiently for your specific space and needs. Careful tweaks, like better carbon pads or mesh prefilters, can save money and make your air feel fresher, minus the headache of complex modifications. It comes down to matching the right DIY boost to your home’s problem areas for maximum impact. Remember to test, maintain, and track results so every upgrade pays off in real-world air quality gains.
